
University semester is over. Exams are over. And I finally get a chance to relax! So what was the first thing I did Friday?
Sleep. And lie in bed for ages. What glorious bliss, especially in winter weather :)
But of course it's time to share some love and attention with my blog. I've actually been looking at ways to build my own website, as opposed to using a blogger template. After spending 12 weeks (and 17 hour straight days working on my web assignment for an entire week) it would be nice to put what I learnt to some decent use. So if you have any suggestions/advice, that would be appreciated!
For now though, I'm gonna show you a quick DIY I did last week on a clutch bag I own. You see, I have been trying to find a small shoulder bag to take to town events (such as concerts where you can't be carrying bulk into a mosh pit) and because I'm a poor unemployed student, I haven't been able to find a decent one I like in my price range.
So when I found some old supplies around the house and a nice clutch bag I hadn't used yet, I had to make the most of the situation. So I present to you a braindead simple and cheap way to turn your clutch to a night-appropriate shoulder bag.
DIY - Clutch bag to Shoulder bag

For me, the perfect bag for town is something that is small, lightweight, strong and ideally cannot be ripped from your shoulders. In Malaysia for example, sometimes bag snatchers cut your shoulder straps and rip your bag off you. So for me, a bag that can withstand that is a bag that's town-appropriate. Cause then it's able to withstand any crowd.

The stuff I found for my shoulder bag were things that you can find in your local craft/dollar store.

The ribbon was bought from the local Emporium - 1.5m worth = .30cents.
And the pliers are just ones I already have (I use them for my jewellery work).


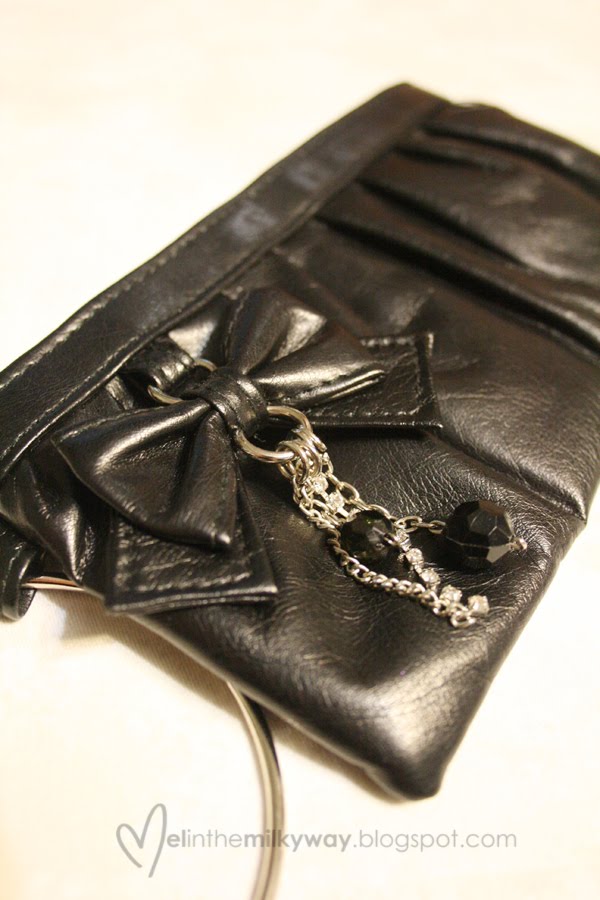
And when you're done, it should look something like this...

Because I only weaved through one type of the chain (the ribbon wouldn't fit through both) it left unsightly ribbon ends. And what's the best way to finish it off?
Bows.


Wrap the ribbon around the chain, and then tie a bow to hide the end. :)
And with that all done, the last step was to attach the chain to the bag:


With one jump ring (which came with the chain) I pierced it through one end of the clutch bag (at the end of the zipper). And with the other end, I put the jump ring in the same loop as the clutch bracelet.
And that was it! One bag upgrade for less than $5, and it's ready for town.


